Easy Strawberry Jam Recipe from Scratch
Strawberry jam is amazing, especially when it’s made with fresh strawberries. This homemade version tastes absolutely delicious and comes together so easily with just two simple ingredients.
There’s something special about making jam at home because you can really taste the fresh fruit, and the flavor is so much better than store-bought.
This strawberry jam is quick, easy, and perfect for beginners, but it still tastes rich and full of strawberry flavor.

I’m going to use this strawberry jam in so many different recipes because it works beautifully in both simple and baked dishes.
You can spread it on toast or bread for breakfast, add it to yogurt or oatmeal, or use it as a filling for cakes, pastries, and cookies.
It’s also perfect as a topping for pancakes, waffles, and desserts. This easy strawberry jam is going to be one of those recipes you’ll keep coming back to because it’s simple, versatile, and always tastes amazing.
Ingredients

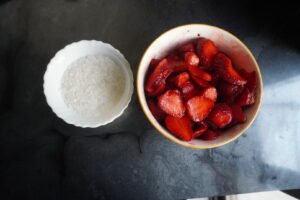
300 grams of fresh strawberries– For the strawberries, I used fresh ones for this recipe. The batch I had was slightly sour, so I skipped adding lemon juice.
However, if your strawberries are very sweet, I recommend adding 1 tablespoon of lemon juice because it really enhances the overall flavor of the jam and balances the sweetness.
I had a mix of sweet and sour strawberries, which worked perfectly for me. Before cooking, make sure to wash the strawberries thoroughly and remove the leafy tops.
I then slice them into medium-thick pieces so they soften easily and break down quickly while cooking.
100 grams of granulated sugar- For the sugar, I used 100 grams of granulated sugar. You can increase the amount if you prefer a sweeter jam, but I find that adding more makes it overly sweet.
I like to keep a ratio of about 3:1 for strawberries to sugar, as this gives the jam a nice balance of sweetness while still allowing the fresh strawberry flavor to shine through.
How to make this Easy Strawberry Jam with Pictures
1. Start by washing the strawberries thoroughly and removing the leafy tops. Cut them into evenly sized, medium-thick slices so they cook and soften at the same time. ready for storing.
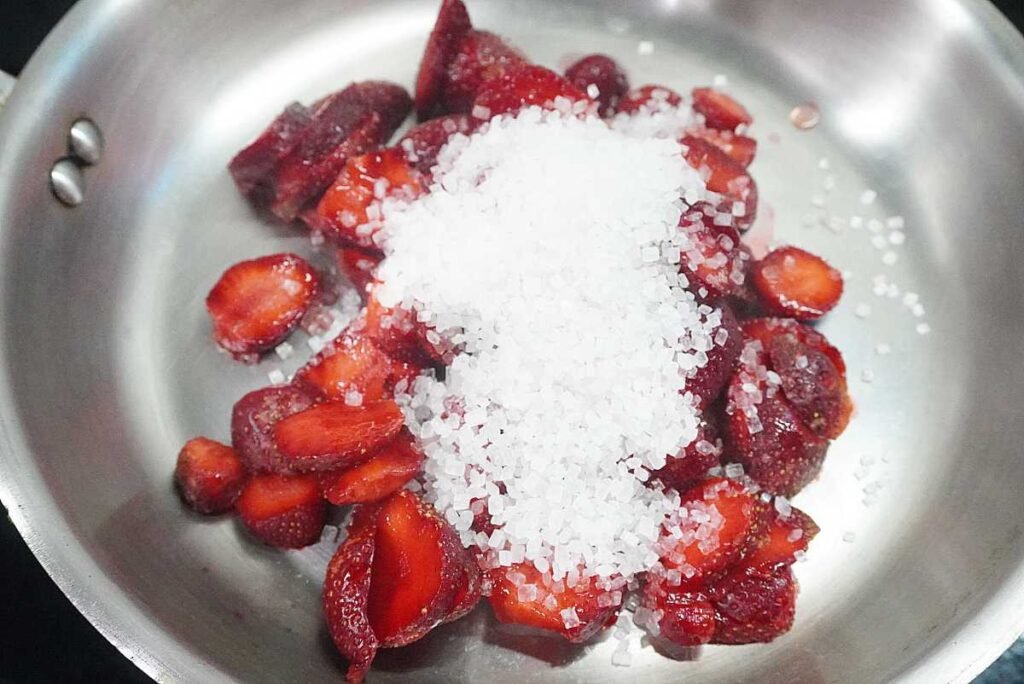
2. Add the sliced strawberries to a pan, then pour in the sugar and stir well to combine. Within a few minutes, you’ll notice the strawberries releasing their natural juices.
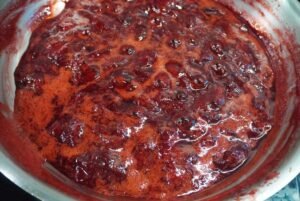
3. Cook the mixture over medium to low heat, stirring occasionally to prevent sticking. As it cooks, the strawberries will continue to break down and release more liquid.
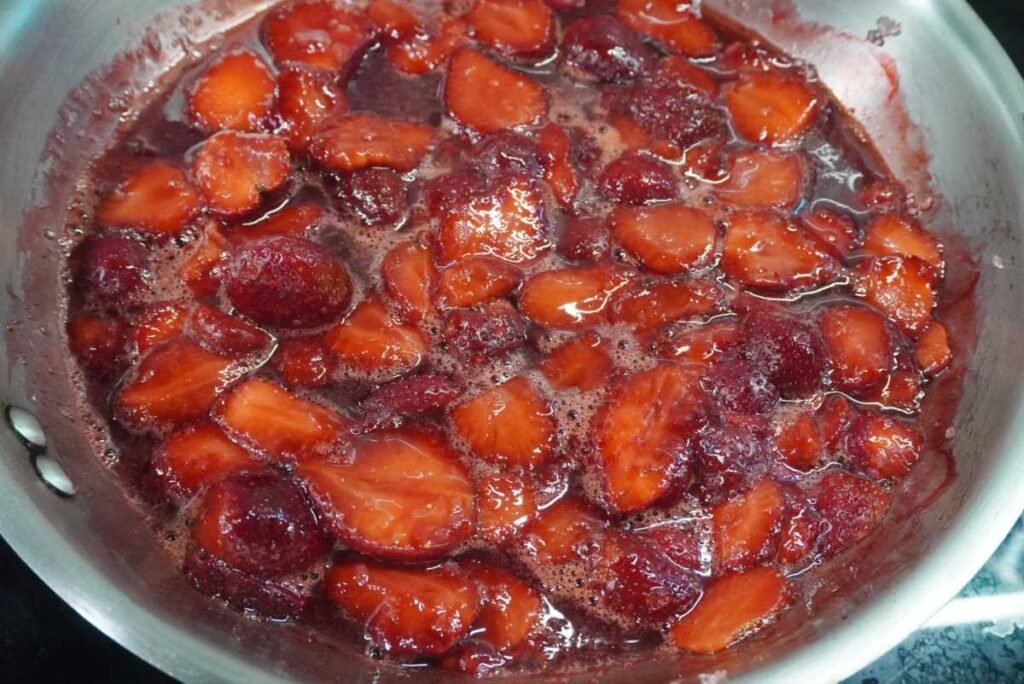
4. After about 20–30 minutes, the mixture will start to thicken and take on a jam-like consistency. When most of the excess water has evaporated, and the mixture looks thick and glossy, you’ll know the jam is ready.
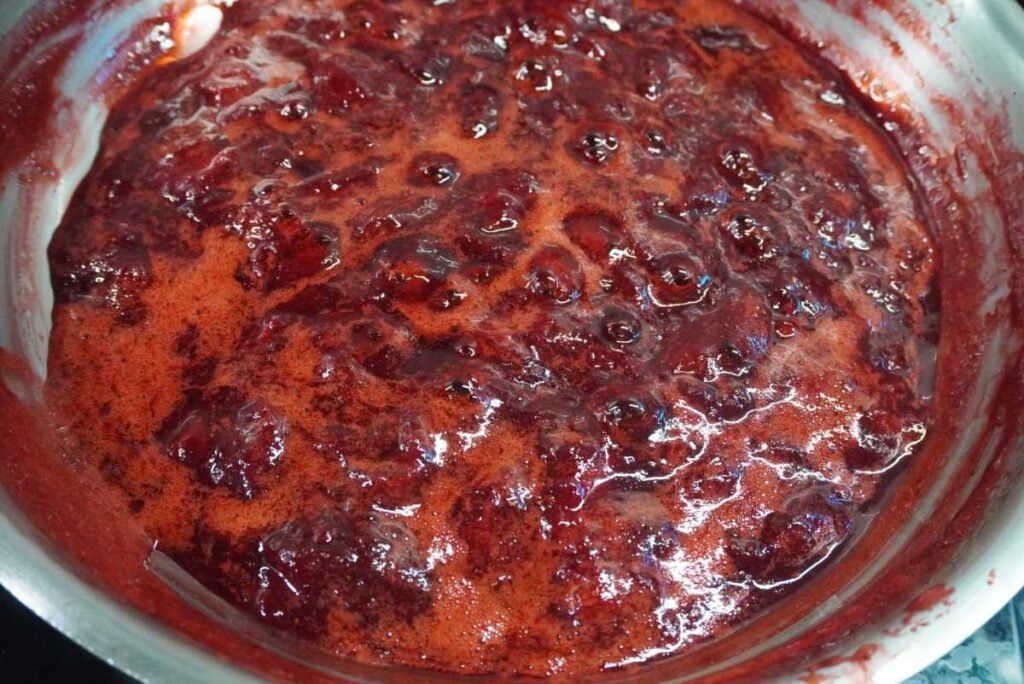
5. At this stage, use a spoon or spatula to mash the strawberries. They will be very soft and will easily turn into a smooth, paste-like texture.
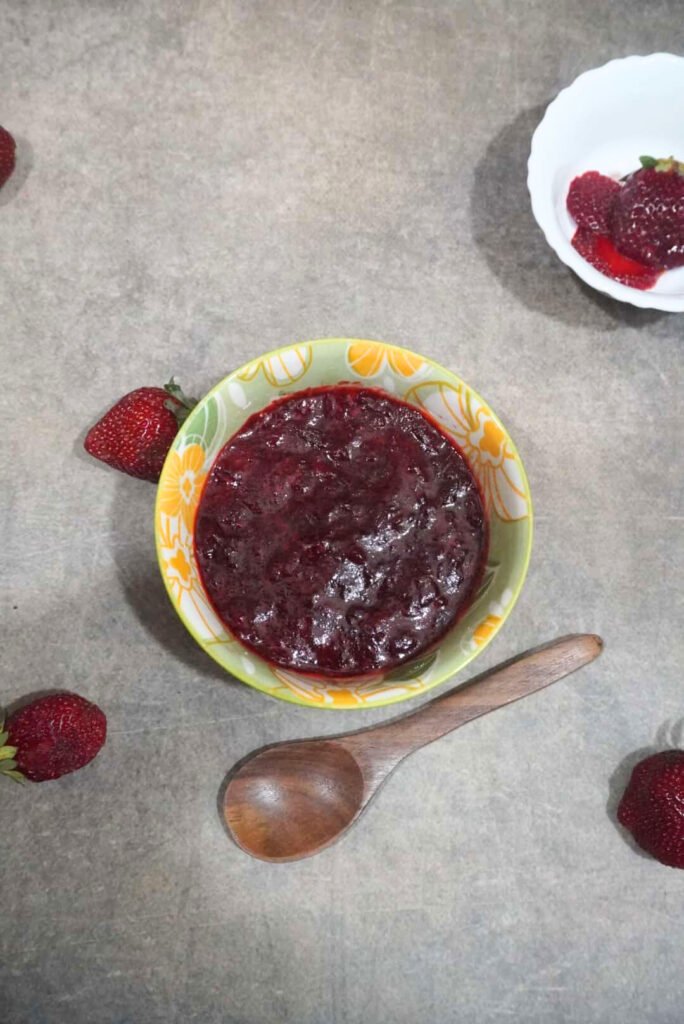
6. Switch off the heat and let the jam cool slightly. Your homemade strawberry jam is now ready to be stored and used.
🫙 Storage & Shelf Life
I store my strawberry jam in a clean glass jar and keep it in the refrigerator so it lasts longer without any issues. When stored in the fridge, this jam easily lasts for about 1 to 2 months. This particular batch lasts around one month for me without any problem.
If you want to store it for an even longer time, you can preserve it by proper canning methods, which can help it last for up to a year. Another option is freezing the jam. When stored in the freezer, it can last for about six months. Always use a clean spoon while serving to avoid contamination and help the jam stay fresh for longer.
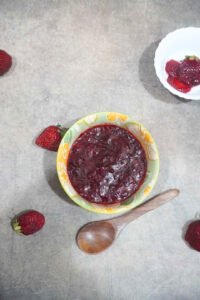
🍓 How to Know When the Jam is Ready (Consistency Test)
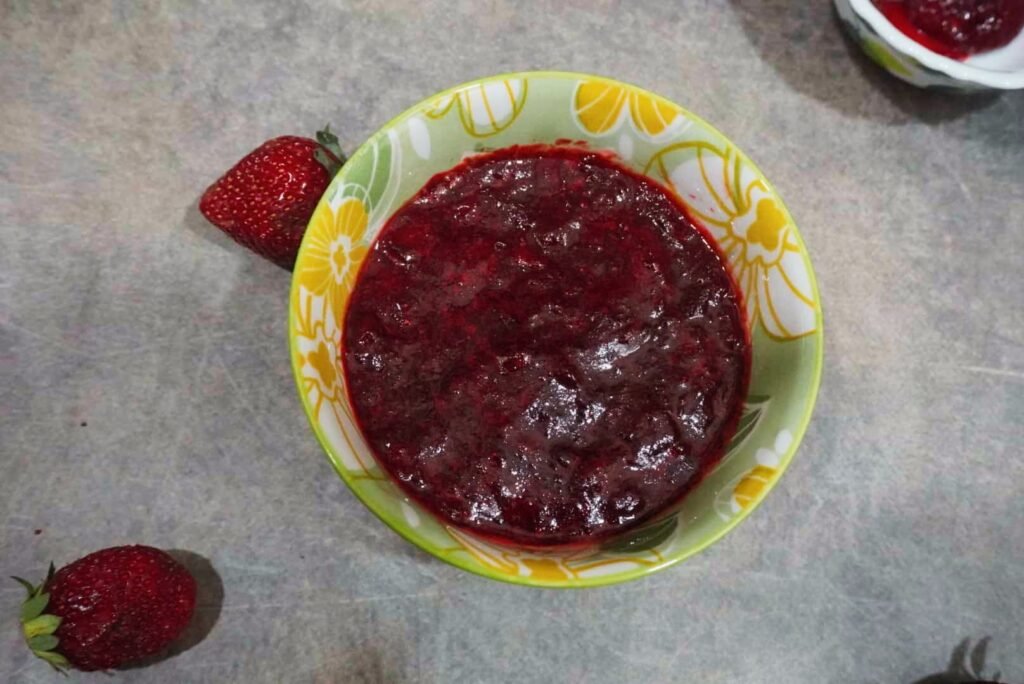
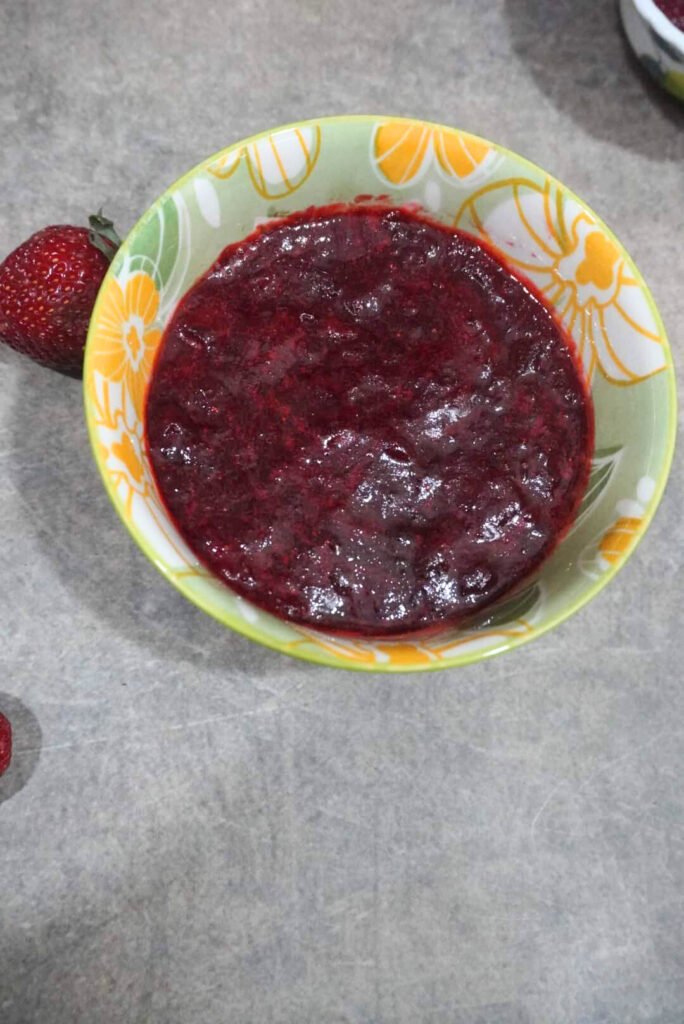
You will know the jam is ready when it reaches a jelly-like consistency and there is no excess water left in the pan. The mixture should look thick, glossy, and rich in color. The strawberries will be completely soft and cooked down.
The jam does thicken slightly more as it cools, but even after cooling, it remains very easy to spread. If the mixture still looks watery while cooking, it simply needs more time on the stove. Letting the water evaporate fully is the key to getting the perfect jam texture.
🥄 Chunky vs Smooth Jam
This strawberry jam has some chunks because I don’t mash it completely. If you mash the strawberries for a longer time, you can get a smooth and paste-like texture. I personally like my jam slightly chunky because you get little pieces of strawberry in between, which taste fresh and give the jam a more natural, homemade feel.
You can easily adjust the texture based on your preference, mash lightly for a chunky jam or mash fully for a smooth jam.
⚠️ Common Mistakes to Avoid
One common mistake is cooking the jam on high heat. High heat can burn the sugar and strawberries instead of letting them slowly break down. Always cook the jam on medium to low heat for the best results.
Adding too much sugar can make the jam overly sweet and overpower the natural strawberry flavor. It’s best to stick to a balanced ratio so the fruit remains the star of the recipe.
Not stirring the jam occasionally can cause it to stick to the bottom of the pan and burn. Make sure to stir every few minutes, especially as the jam thickens.
🍯 Variations
If your strawberries are very sweet, you can add 1 tablespoon of lemon juice to enhance the overall flavor and balance the sweetness. If your strawberries are slightly sour, you can skip the lemon juice, as the natural acidity already works well.
You can reduce the sugar slightly if you prefer a less sweet jam, but keep in mind that sugar also helps with texture and preservation. A small amount of vanilla extract can be added for extra aroma and depth of flavor.
Frozen strawberries can also be used if fresh ones are not available. Just thaw them first and cook them the same way as fresh strawberries.
❤️ Why Homemade Strawberry Jam Is Better
Homemade strawberry jam is better than store-bought because it is made with real fruit and no artificial preservatives.
You have full control over how sweet it is and how thick or chunky you want it to be. The flavor of fresh strawberries really stands out, and the jam tastes more natural and fresh.
It is also more affordable and satisfying to make at home, especially when strawberries are in season.
There is something special about making your own jam and using it in different recipes, knowing exactly what went into it.
❓ FAQ
Can lemon juice be skipped?
Yes, lemon juice can be skipped if your strawberries are already slightly sour. If your strawberries are very sweet, adding lemon juice helps balance the flavor.
Can frozen strawberries be used?
Yes, frozen strawberries can be used. Thaw them first and cook them the same way as fresh strawberries.
What if my jam is too runny?
If your jam is runny, cook it for a little longer until the water evaporates and the mixture thickens properly.
Can jaggery be used instead of sugar?
You can experiment with jaggery, but the flavor and color will change, and the texture may be slightly different compared to using granulated sugar.

Easy 2-Ingredient Strawberry Jam
Ingredients
- 300 grams Fresh Strawberry(washed, hulled, and sliced)
- 100 grams Granulated Sugar
- 1 tbsp Lemon Juice
Instructions
- Wash the strawberries well and remove the leafy tops. Cut them into evenly sized, medium-thick slices.
- Add the strawberries to a pan and pour in the sugar. Mix well and let them sit for a few minutes until the strawberries release their juices.

- Cook the mixture over medium-low heat, stirring occasionally to prevent sticking.

- After about 20–30 minutes, the mixture will thicken and become glossy as the water reduces.
- Mash the softened strawberries with a spoon or spatula until you reach your preferred texture (smooth or slightly chunky).
- Turn off the heat and allow the jam to cool slightly. Transfer to a clean jar and store.
Notes
- Add lemon juice only if your strawberries are very sweet.
- The jam thickens more as it cools.
- Mash lightly for chunky jam or fully for smooth jam.
- Always cook on low to medium heat to avoid burning.