How to Autolyse Pizza Dough- 70 Percent Hydration
Autolyse Pizza Dough is interesting as you mix the dough with water first and then knead the remaining ingredients into it, including yeast, oil, sugar(optional), and salt.
I was skeptical of making dough this way because I wasn’t sure if I could knead the other ingredients later, like the yeast and salt.
But it turned out to be quite easy, and it gives way better results than other pizza dough recipes like cold fermentation, poolish, or just the Simple Neapolitan pizza dough recipe.
The fermentation time with this autolyse pizza dough recipe is a lot less, and a simple overnight fermentation is enough to get the best results.
Autolyse is a process where the flour, or the dough, is generally hydrated with water alone by soaking it for a certain time.
Pizza doughs, in general, are just very much like mixing dry ingredients and then adding to wet ingredients, but these recipes have a certain order in which you add ingredients, which makes a huge difference in the results.
Autolyse pizza dough makes the pizza dough a bit more flavorful. This process is simple but can go wrong if executed poorly.
The term Autolyse was coined by the renowned French baking instructor Raymond Calvel.
It was used to improve the dough’s elasticity and the flavor, texture, and color of the final baked good.
Table of Contents
What is the autolyse technique?
Autolyse method involves the process of hydrating the dough by incorporating the strong flour and water together and then letting the mixture rest for at least an hour or more.
After letting it rest, then you can add the rest of the ingredients to complete the process. Letting the dough rest it allows it to concentrate all the enzymes inside it.
After two to three hours of autolyse, you add the rest of the ingredients and make the pizza dough. Autolyse is frequently used in sourdough recipes to get better flavor and texture.
Autolyse is mainly used in bread making and helps make sourdough breads, Croissant dough, French breads, etc.
It makes the handling of the dough so much easier, and I can confidently tell you that you would love making pizza with autolysis.
Advantages of Autolyse Pizza Dough
1. Improved elasticity- When you leave the dough and water to hang out for a while, it helps create the gluten bonds inside the dough, improving its elasticity.
Since no other ingredient hinders gluten formation, the dough becomes elastic and easy to work with.
2. Improved Flavor: The flavor of autolysed dough is something special. I’ve noticed that the longer the flour and water hang out, the more complex and delicious the dough becomes. This adds a tasty dimension to my pizza crust.
3. Nonsticky dough- I usually find 00 flour dough very sticky while kneading, especially when the hydration is as high as 70 percent. In this recipe, I used 70 percent hydration pizza dough, and it was so easy to knead the pizza dough. This is hands down one of the best ways to make Neapolitan pizza dough.
4. Dough holds more Carbon dioxide, leading to a fluffy yet crispy crust- I think autolyse works even better than Poolish, and you will see the results in the end. The crust was crunchy on the outside and soft inside.
5. Autolysis promotes carotenoids by increasing their availability as the flour hydrates. This enhances the crust’s color, flavor, and health benefits, as carotenoids play a role in oxidation and offer antioxidant properties, albeit in a modest manner.
How to Autolyse?
Autolyse is very simple. Just take the entire flour and water that you would use to make the recipe, mix them, and form a homogenous mixture. Let them rest for about 2 hours.
You have your autolysed dough ready to use.
How long do you autolyse pizza dough?
There are so many different recipes(including sourdough autolyse recipes) that mention different autolyse times, which can range anywhere from 0 to 12 hours.
However, for pizza dough, 1-3 hours is a good time to autolyse your dough at room temperature. If you plan to autolyse for longer, then make sure to refrigerate your water+dough mix.
I never autolyse 00 flour for longer than 3 hours, and I don’t think it is necessary either. You should check out the Poolish pizza dough recipe and its results to make pizza recipes using preferments.
Autolyse vs Fermentolyse
The main difference between Autolyse and Fermentolyse is that in Autolyse, you do not start with a starter as it includes only flour and water.
On the other hand, fermentolyse includes flour, water, and a starter, making it a different process altogether. These two terms are mainly used in the sourdough world, so you can forget this entire explanation if you are just here to make pizzas.
Autolyse Pizza Dough Recipe
Ingredients
– 400 grams of 00 Flour
– 280 ml of Water
-1.5-2 grams of Active Yeast
-3 grams of Salt
– 2-3 tbsp of Olive oil
recipe
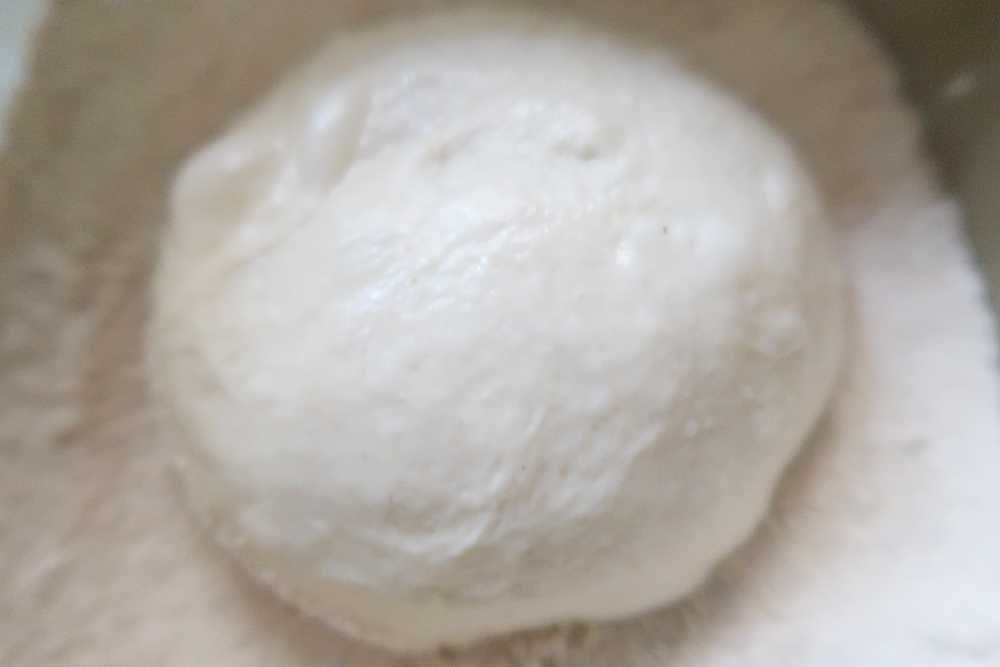
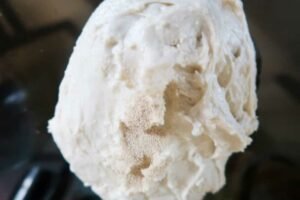
1. Mix all the flour and water and form a homogenous ball. Let it rest for 2 hours. This is autolysis, and it would happen for two hours.
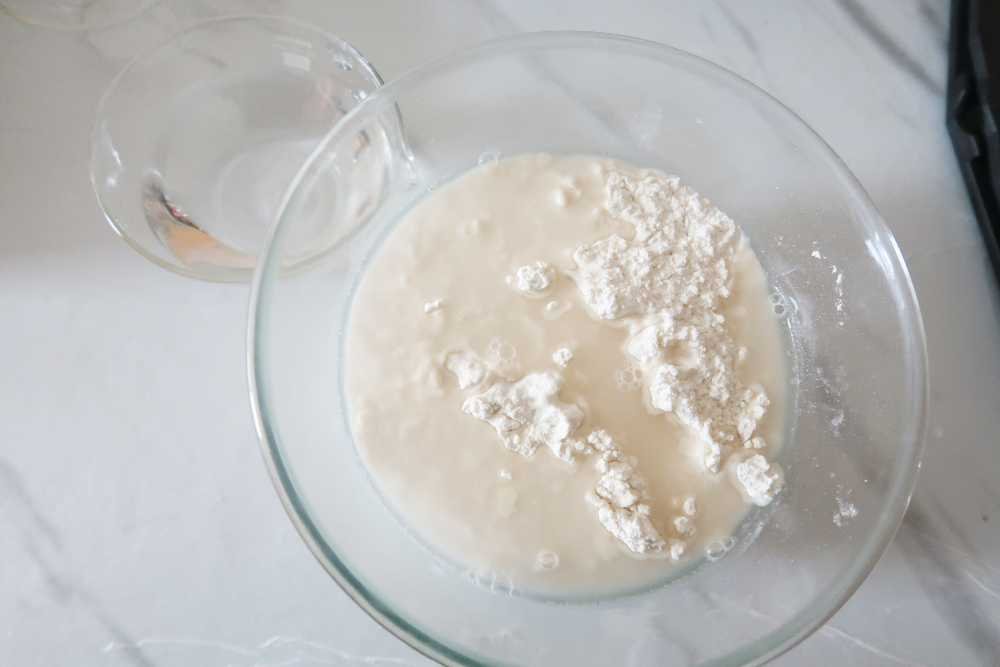
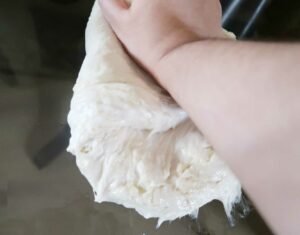
2. After two hours, the dough is more stretchy than before. Now, take out the dough on a flat surface. Make sure you put some olive oil on the surface and knead it.
You push the dough forward with your hands till it gets stretched, and then you pick up the side that went away from you and fold it back, repeating it.

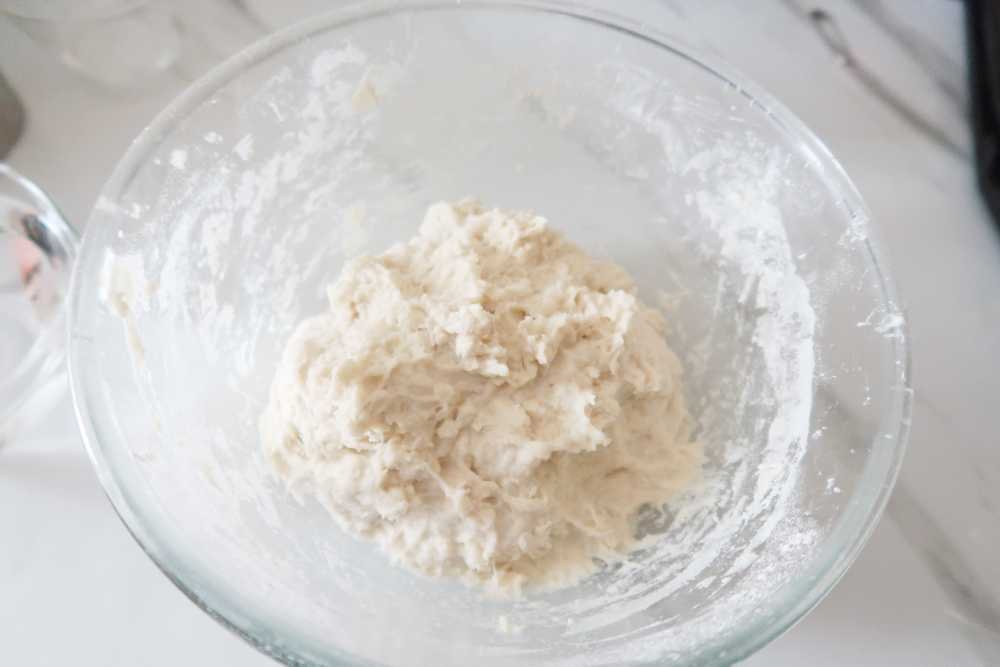
3. Now add some instant active yeast(which doesn’t need to be activated with water) to the dough and continue kneading it until it mixes well in the dough.
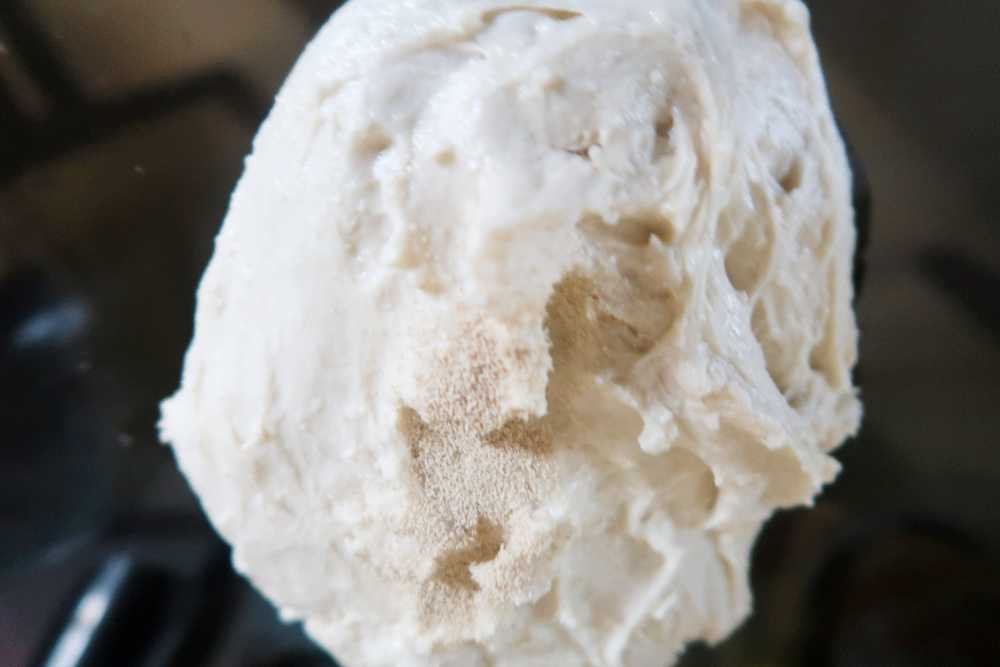
Tip- If you use active dry yeast(it has larger granules) that need to be activated with water, then you should reserve some water from the 280 ml and use it to activate the yeast, and add it now while kneading.
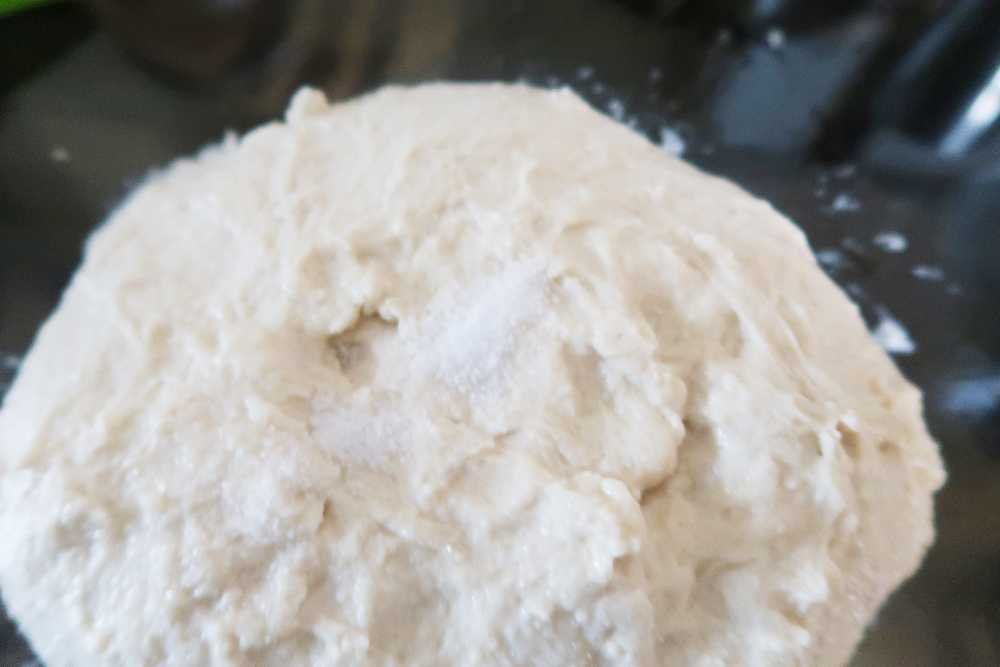
4. The dough will get sticky at times, but be patient and keep kneading without worrying. If it gets too sticky, use olive oil on your palms and keep going. Now, finally, add salt while the dough is stretched out and start kneading it again till it mixes well.
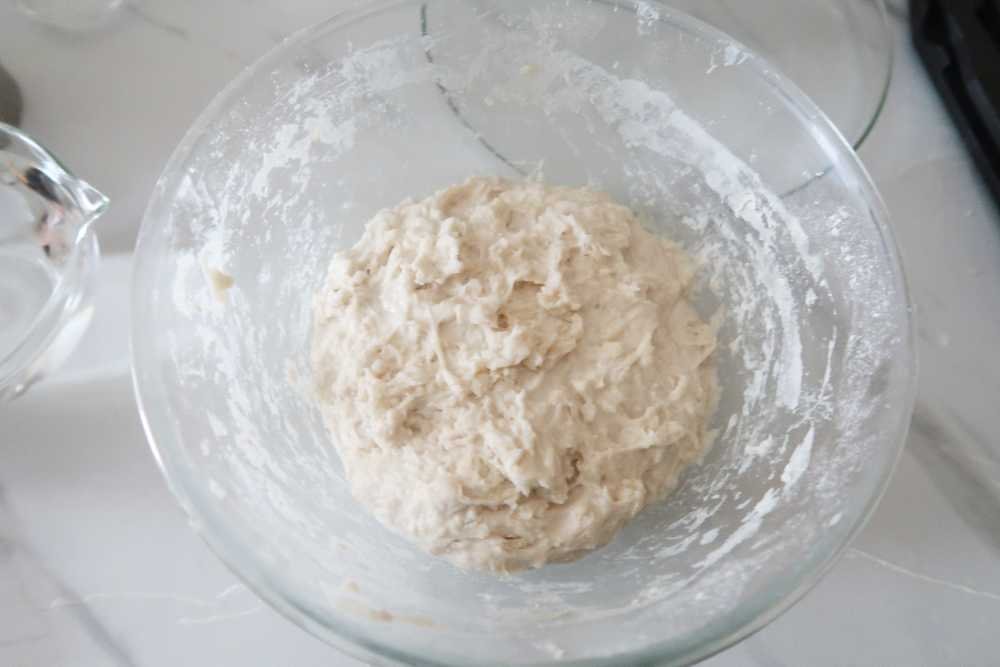
5. The dough will finally become smooth, and that is when you can stop kneading. This would take around 10 minutes.
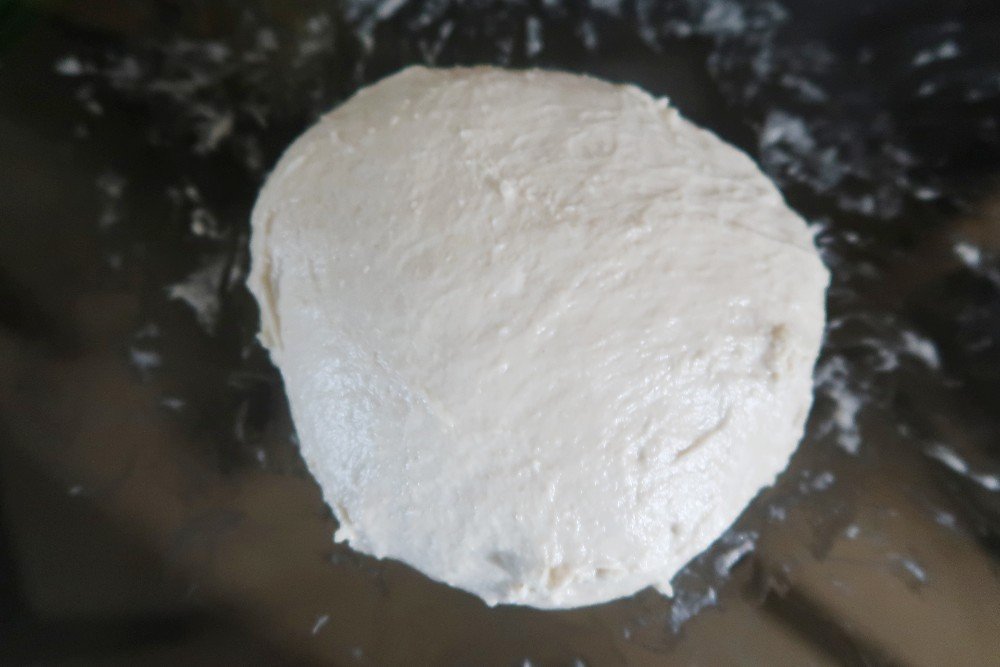
But you would end up with a smooth dough ball. Now take a bowl, coat it with olive oil, and let the autolysed pizza rest in the fridge.

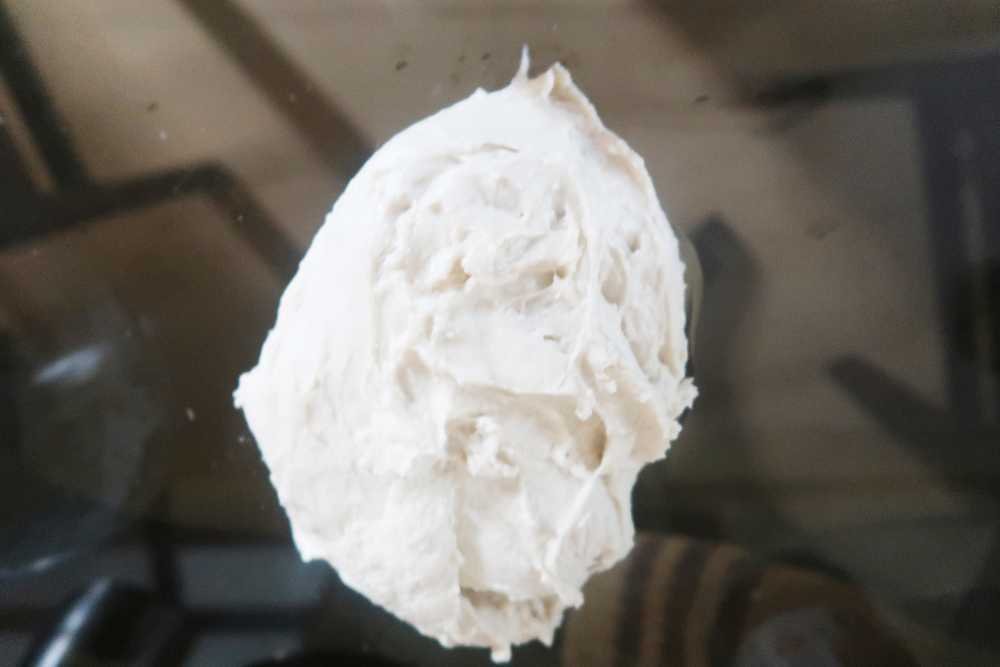
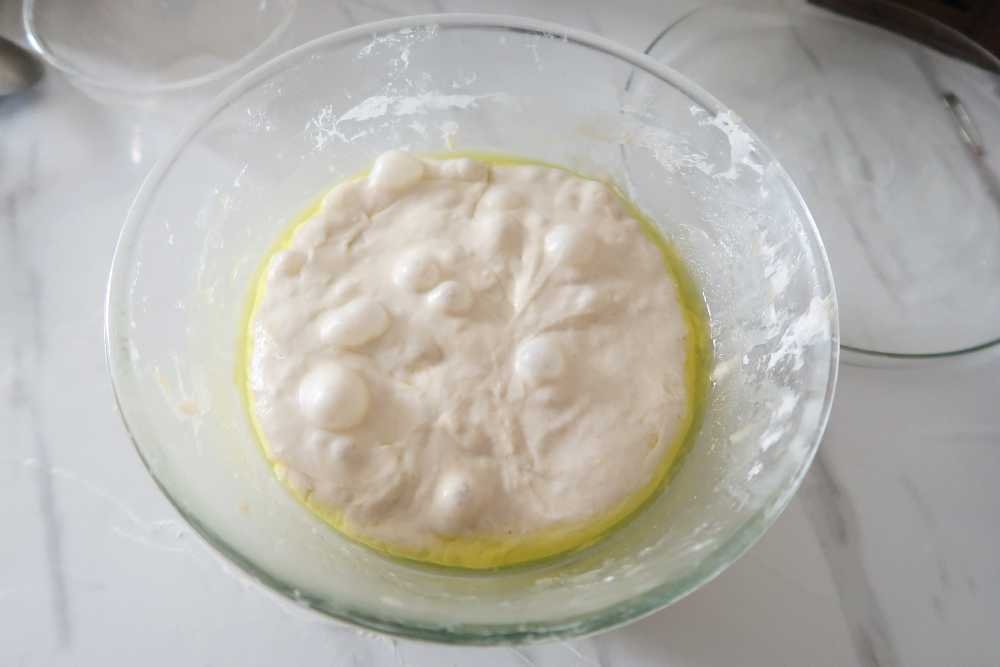
I let it rest for 12 hours and then took it out and let it ferment at room temperature for another six hours(It was 35 degrees Celsius where I live). But this is how your dough should look like.
You can see all the bubbles forming on top, indicating that the dough is ready to be used.
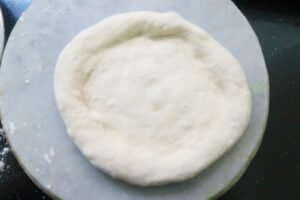
6. Now make a pizza ball and dunk it in dry flour. Coat the entire ball in dry flour, put it on a flat surface, and stretch out the dough by pushing it from the center to the sides.
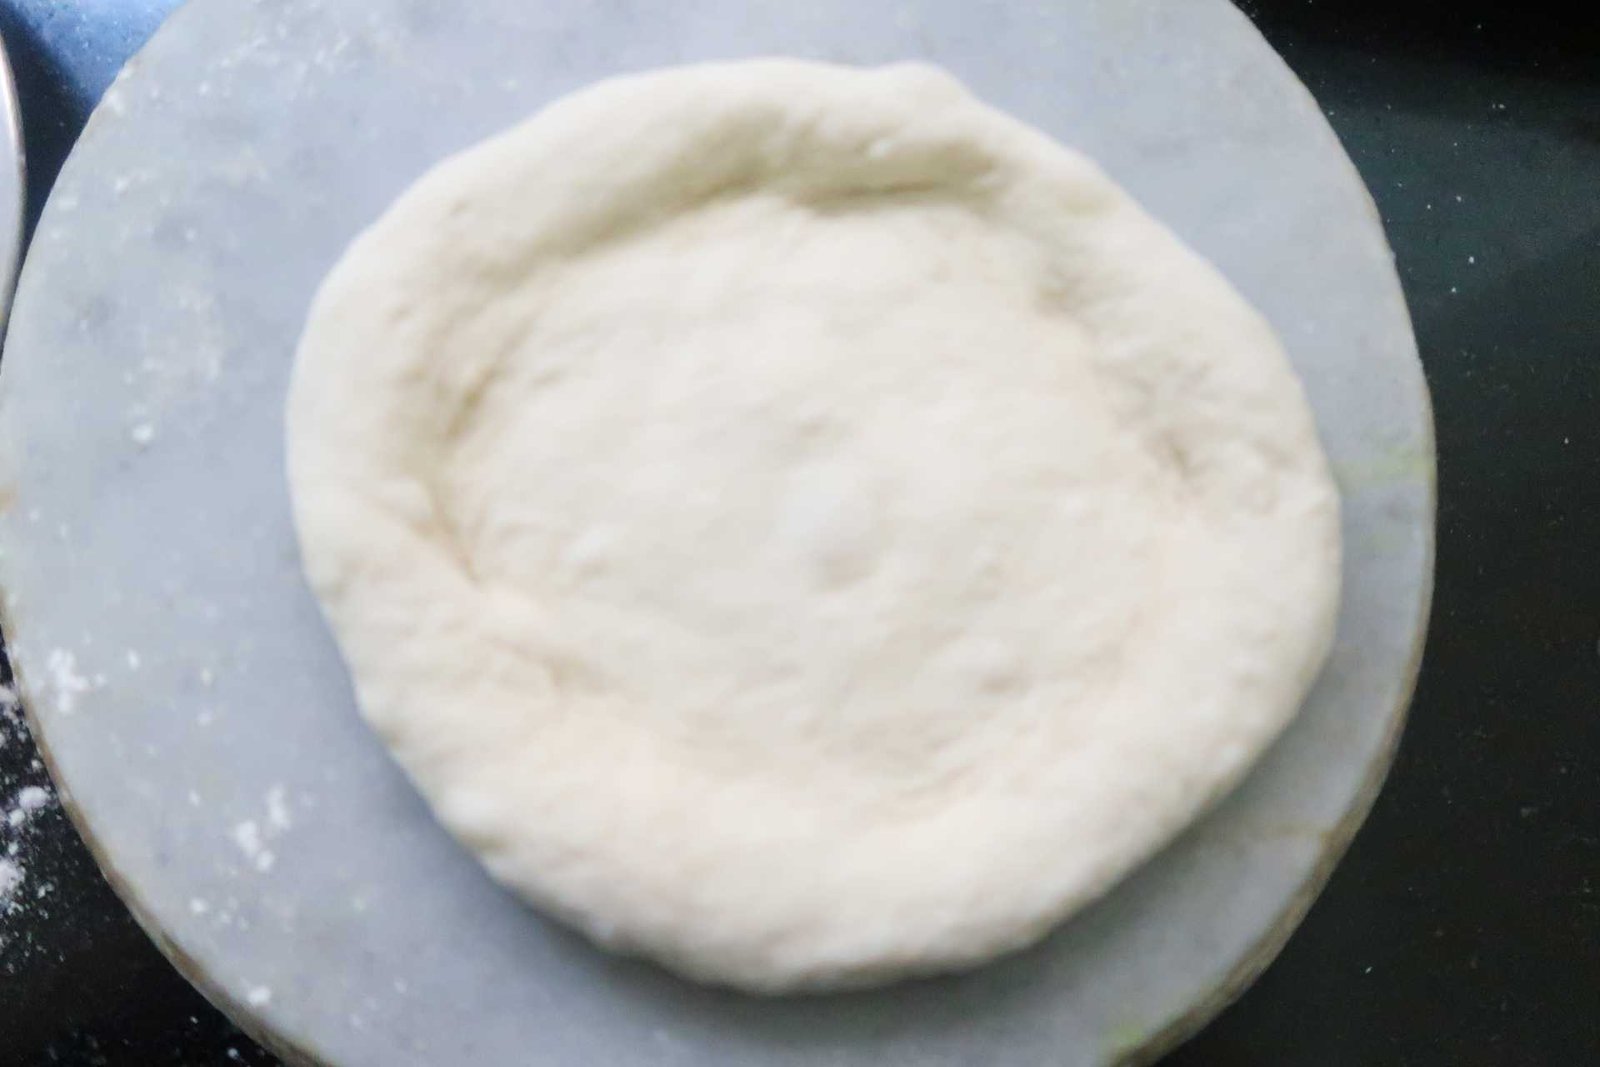
This way, you would push all the air bubbles to the side and form a pizza cornicione or a rim on the pizza.
7. Add your sauce and toppings and cook in a pizza oven.

You can also cook this in a home oven; just cook the pizza on a pan at medium-high heat for about 5 minutes, then put the pizza sauce cheese in the home oven at 500 degrees Fahrenheit for 3-4 minutes.

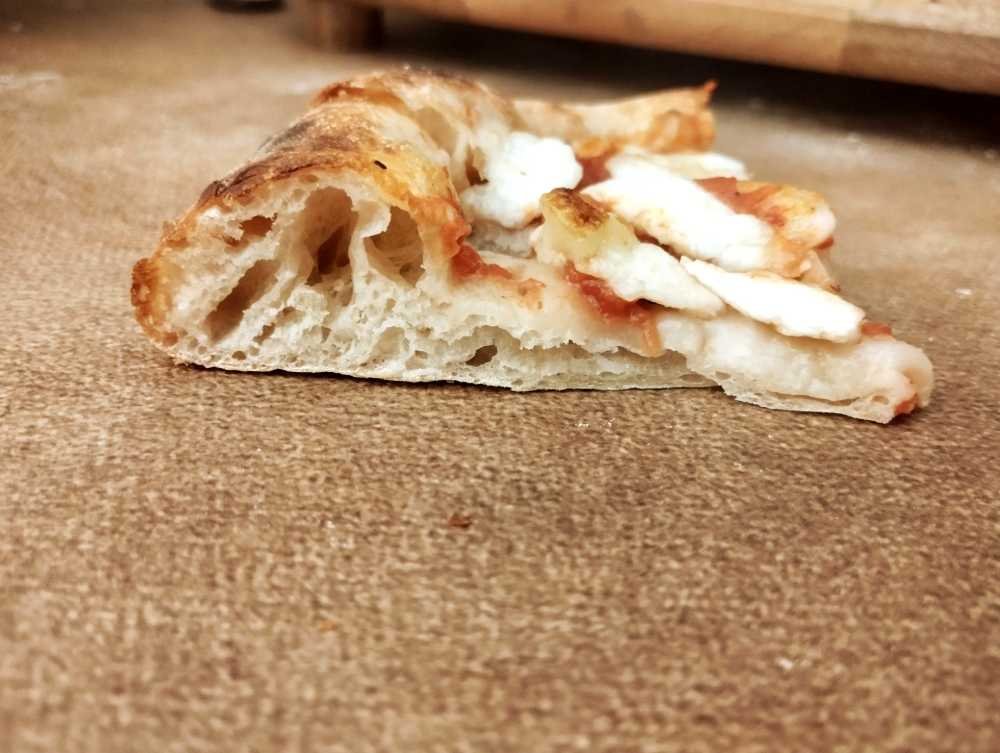
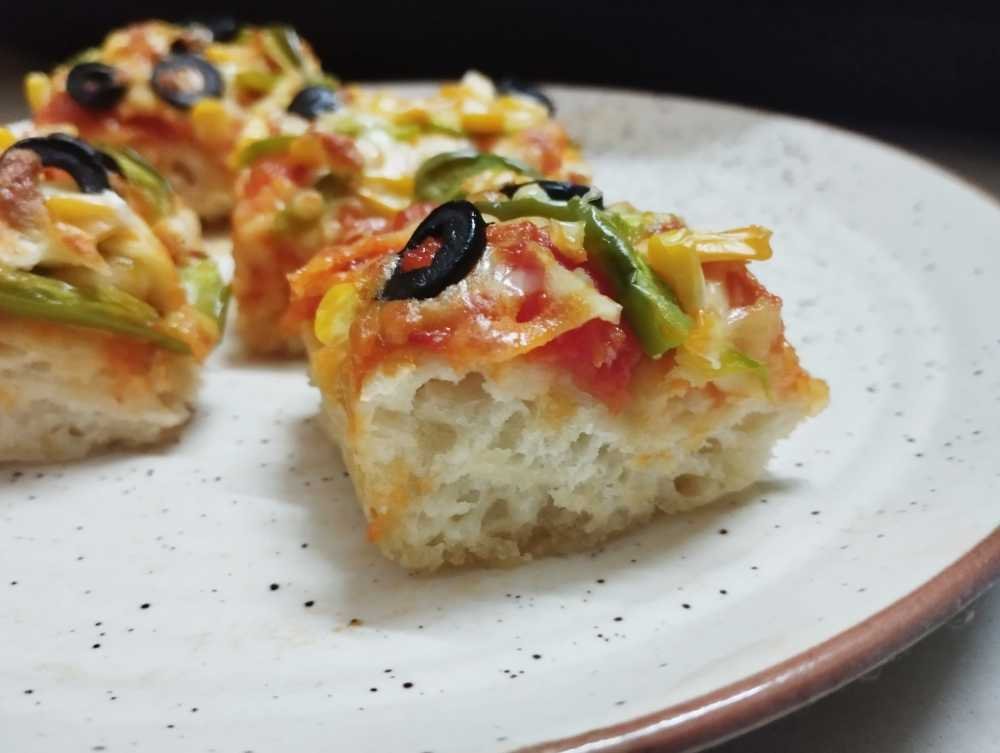
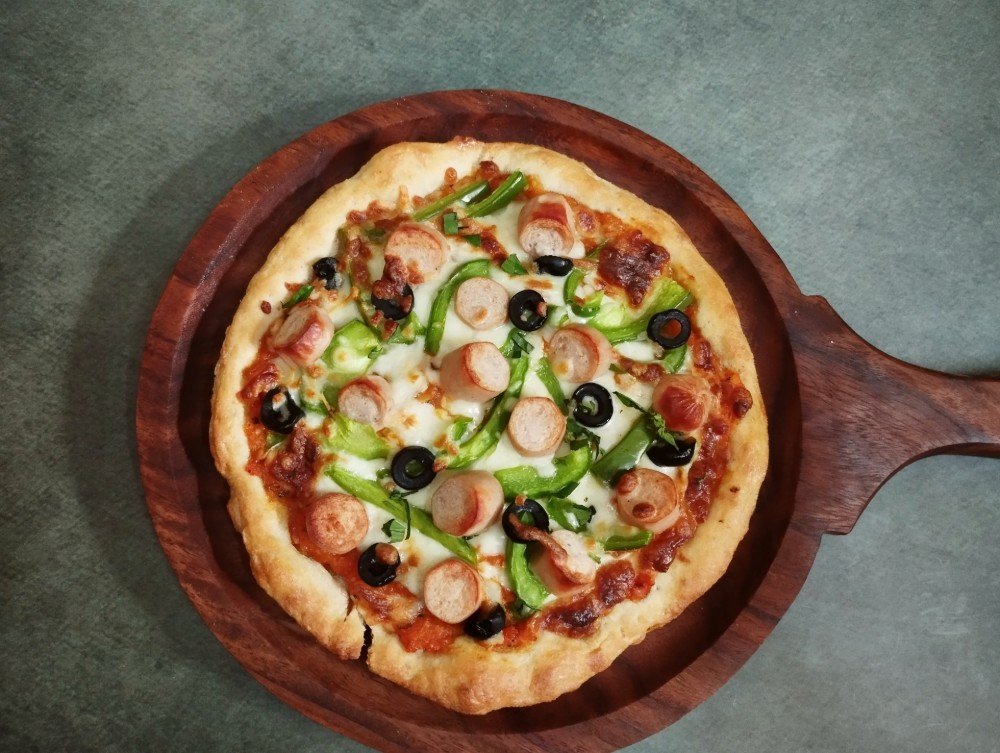
8. Your pizza is ready, and these are my results.


My Results of Autolyse Pizza Dough
I felt autolyse pizza dough is much easier to make and manage, and knead the dough.
If you are good at kneading the dough, then you would like this method. It is simple and easy, and you do not have to wait too long to make pizza with this pizza dough.
Leave it overnight in the fridge and the morning for a few hours at RT, and your dough is ready.
Some people even leave the dough overnight at RT, but my weather is too hot here, and I would rather it slowly ferment in the fridge at cooler temperatures.

Brtter Crust with Autolyse Pizza Dough
Oh yes, this was so evident. The crust was airy, bubbly, and crispy with this autolyse pizza dough method. I was a big fan of how everything turned out, and it was so easy to make.
You must ensure you mix the ingredients well and have a homogenous dough, and your work is done.
You can even use a stand mixer if you are not good at kneading the dough with your hand. I tried making different pizzas with this recipe; this veggie pizza was my favorite.
I also made butter chicken pizza, which was so delicious; if you have not tried butter chicken pizza, then you are just not living life. It was an experience on another level.
Would I Autolyse Neapolitan Pizza Dough often?
Yes. Absolutely. It was so easy to work with the pizza dough, and kneading was much faster and easier even when the pizza dough hydration was 70 percent, which is pretty high.

Larger air pockets formed everywhere in the pizza crust, and the pizza was so delicious that I’m making it again.
Final Thoughts on Autolyse Pizza Dough
Autolyse pizza dough is an easy and better way to get Neapolitan Pizza dough that is all bubbly. The crust formation is much better in this method, and the best part is the reduced fermentation times.
In all pizza doughs that give this airy and web-like structure inside the pizza crust, like the Biga Pizza dough or Poolish Pizza dough, you are doing double fermentation, and it takes a little longer to make pizza.
However, I felt I autolyze pizza dough is quicker, and you do not need to wait long to start making pizzas.
Try this recipe; it is easy, quick, and makes the most delicious and great-looking pizzas!
Did I miss something, or do you have any questions? Let me know in the comments.

Autolyse Pizza Dough
Ingredients
- 400 grams 00 Flour
- 280 ml Water
- 1.5-2 grams Instant Active Yeast
- 3 tbsp Olive Oil
- 3 grams salt
Instructions
- Mix entire flour and water in a bowl and keep it aside for about 3 hours. This is the autolyse process.

- After three hours, take the dough out of the bowl add some olive oil to the surface and start kneading the dough.
- Add Instant active yeast(this one doesnt need to dissolve in the water, active dry yeast needs to be activated in water before use) to the dough and start kneading the dough for a few minutes to let the yeast mix into the dough very well.
- Add the salt and start kneading the dough again till the salt completely combines with the dough.

- Now your pizza dough is ready, let it sit for 12 hours in the refrigerator, and then take it out and keep it at room temperature for 6-8 hours before you start making pizza dough balls.

- Now make pizza balls.

- Stretch the dough and layer it with pizza sauce and cheese. Cook it in the oven for about 400 degrees Fahrenheit for 15 minutes.
- Your Autolyse Pizza is ready.


Try a poolish to solve the problem of mixing in the yeast water. That is basically your yeast and equal parts water and flour left to ferment overnight (about 18 hours). It will mix into the dough very nicely.
This is an interesting coincidence because I was about to write a detailed post on Poolish Pizza Dough and how it is a great way to make pizza dough. Thank you for letting me know as well!